Showing posts with label Windows 7. Show all posts

Jul 7, 2011

24 comments

Add Gpedit.msc to Windows 7 Home & Starter Editions

The Group Policy Editor (Gpedit.msc) is one of the most useful tools for administering policy on Windows 7. While Windows 7 Ultimate, Professional and Enterprise editions have gpedit.msc, Unfortunately certain editions of Windows 7 like Home Premium, Home Basic and Starter Editions do not include the Group Policy Editor.
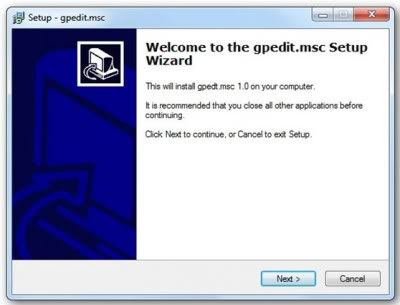
One of thewindowsclub forum members davehc has compiled a tool Gpedit Installer that allows you to add gpedit.msc to Windows versions that do not have it, like Windows 7 Home Premium, Home Basic and Starter Editions.

To do so, download the zip file, unzip its contents and run the installer as admin. This is how it will go:

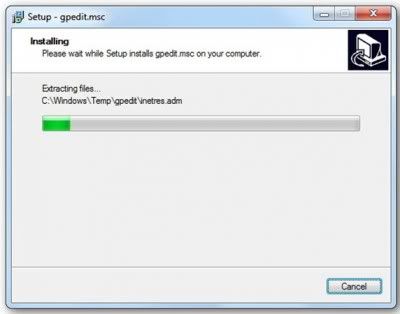
At the end of the run, you will find that it will have add the Group Policy Editor to your Windows Home Premium, Home Basic or  Starter Edition.

Above Steps are enough for x32 bit systems.

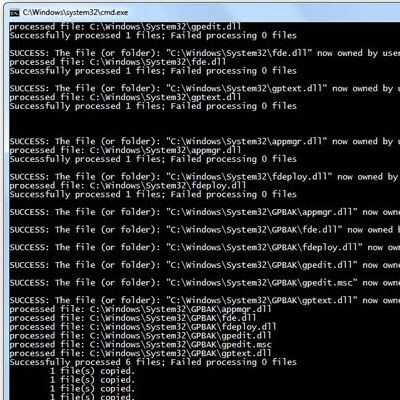
Extra Step for x64 bit systems:
After Installing the above installer - Download the zip file below and extract the gpecit.msc file to C:\Windows\System32 Folder manually

So if you plan to try it out, do let us know how it goes. Best to always create a system restore point first before making any changes to your system.

Feb 10, 2011

0 comments

MySQL Explorer: Import And View MySQL Database From Desktop

MySQL is one of the well-known database management software applications and almost all open source applications use MySQL at the back-end.  

MySQL Explorer lets you view and explore MySQL databases quickly, a small handy application for database administrators, webmasters, and developers.


It is a portable application. Specify the username and password to connect to MySQL, once your connection is established then it will list down all the available databases.

Click the Database name in the first list box and it will populate  the related tables for the selected database.


You can use the navigation buttons to move back and forth through out your tables.

MySQL Explorer Navigation

The Import Database option lets you import another database to your MySQL server. All you need is a schema file for MySQL. This can also be immensely helpful to the webmaster who won’t need to go all the way to PhpMyAdmin only to import the database.

Since the application’s main purpose is to view the database, export and delete functionality is thus not available at the moment. If you want such functionality, just give a shout to the developer and let him know.

Download MySQL Explorer

We tested it successfully on Windows 7, it works with all previous versions of Windows as well.

Create Multiboot Windows And Linux USB Drive With WinSetupFromUSB

There are many tools available out there which allows user to create bootable USB drives, but what if you need to create a multiboot USB drive which can keep more than one bootable installation packages, lets say,  Windows XP, Windows Vista, Ubuntu and Windows 7?

WinSetupFromUSB can create a multiboot setup, allowing user to keep a range of bootable ISO files on single drive.
The application comes with support for OS including,  Windows 2000, Windows XP, Windows 2003 Server, Windows Vista, Windows 7, Windows Server 2008, Parted Magic, and Ubuntu,G4D.
Just specify the OS installation directory to create multiboot USB drive with a single click.


Usage is simple and self-explanatory. It’s recommended to insert a formatted drive, however, Bootice and RMPrep options are available to format data. Now in Add to USB disk section, hover the mouse pointer over the OS checkbox to read the description of required files for creating ISO images.

After understanding the pre-reqs, select the checkboxes and specify the location of folder where OS setup files are residing. Once it detects correct setup with all required files, Go button at the bottom will become active. Click this button to start the process. It is worth noting here that it takes far more time than creating a single bootable USB drive, so have patience.

wind 3

As of now, QEMU test is in experimental stages, therefore, you need not to go for inspection. Enabling Advanced options checkbox will show settings related with creating bootable USB drive.

advance 2

Since it is in beta testing phase, you might run on some errors while creating a multibootable USB. It works on all versions of Windows.

Download WinSetupFromUSB

Dec 26, 2010

0 comments

16 "GodModes" For Windows 7

Given that Microsoft is keeping schtum, it's probably safe to say Vista users shouldn't try the shortcuts below.


{ED7BA470-8E54-465E-825C-99712043E01C}
{00C6D95F-329C-409a-81D7-C46C66EA7F33}
{0142e4d0-fb7a-11dc-ba4a-000ffe7ab428}
{025A5937-A6BE-4686-A844-36FE4BEC8B6D}
{05d7b0f4-2121-4eff-bf6b-ed3f69b894d9}
{1206F5F1-0569-412C-8FEC-3204630DFB70}
{15eae92e-f17a-4431-9f28-805e482dafd4}
{17cd9488-1228-4b2f-88ce-4298e93e0966}
{1D2680C9-0E2A-469d-B787-065558BC7D43}
{1FA9085F-25A2-489B-85D4-86326EEDCD87}
{208D2C60-3AEA-1069-A2D7-08002B30309D}
{20D04FE0-3AEA-1069-A2D8-08002B30309D}
{2227A280-3AEA-1069-A2DE-08002B30309D}
{241D7C96-F8BF-4F85-B01F-E2B043341A4B}
{4026492F-2F69-46B8-B9BF-5654FC07E423}
{62D8ED13-C9D0-4CE8-A914-47DD628FB1B0}
{78F3955E-3B90-4184-BD14-5397C15F1EFC}


[UPDATE] Just a quick reminder, guys: you need to put "[blank]." before any of the strings above in order for them to work.

For example, GodMode was "GodMode.{ED7BA470-8E54-465E-825C-99712043E01C}"

How to Activate GodMode in Windows 7

                        
Want to activate GodMode in Windows 7? Here's how!

                   Windows 7 users are all abuzz about the OS and its GodMode. If you haven't heard of it, GodMode is a folder that brings together a long list of customization settings allowing you to change all your settings from one place. Neat huh? It's very easy to enable and damn useful if you tweak things around a lot.
   
       Create a new folder.

       Rename the folder to 

        GodMode.{ED7BA470-8E54-465E-825C-99712043E01C}
        (note that you can change the “GodMode” text, but the following period and code number are essential).

         The folder icon will change — double click it to show the GodMode window:


The window shows nearly 50 sections with quick links to configuration options. Strictly speaking, it’s not a God Mode since all the options are available elsewhere. It’s more akin to an “all tasks” list — but you may find it easier than stumbling through Windows numerous screens and panels.

Warning!

The trick appears to work on both the 32 and 64-bit versions of Windows 7. Vista 32-bit and Windows Server 2008 32-bit should also work. However, it is known to crash 64-bit versions of Vista — and you may need to boot in safe mode or to the command line to delete the folder.

Dec 23, 2010

0 comments

Adding/Modifying OEM Information in Vista and 7

P90X Extreme Home Fitness Workout Program - 13 DVDs, Nutrition Guide, Exercise PlannerOEM(Original Equipment Manufacturer) Information is the meta data provided by the original manufacturer of your computer which may include the manufacturer’s name, model number, serial number, support website etc…   If you have seen an OEM logo in your System Properties window and want to modify it, this tutorial can be helpful for you. If you have a home assembled computer than you can add OEM information in your computer.

For Windows 7 and Vista
Open the Windows Registry Editor , alternatively you can type regedit in the RUN dialog box and hit enter.

Navigate to the subkey HKEY_LOCAL_MACHINE\SOFTWARE\Microsoft\Windows\CurrentVersion\OEMInformation,
here you can double click in each key and change its value.

For the OEMlogo you should have a bitmap picture( .bmp extension) of size 120px X 120px and 24 bit color depth.

After you are done you can view the System Properties dialog box by right clicking on My Computer and clicking on Properties.

How To: Create A Theme Pack In Windows 7


A lot has been written on the fancy look of Windows7 ever since it was unveiled at PDC 2008. 
Microsoft has done wonderful job by adding many new features that are not only cool and but also light on system resources, making Windows 7 faster than its predecessor Vista. 

There is an interesting feature in Windows 7, called theme pack, which was not the part of earlier versions of Windows. A theme pack contains following things:
1. Desktop Wallpaper
2. Screensaver
3. Sounds
4. Slideshows
5. Color of the theme
6. Mouse Pointers
7. Desktop icons

And you can install a theme pack on any Windows 7 machine without patching Windows system
http://kona.kontera.com/javascript/lib/imgs/grey_loader.gif
files. That is, you need not to use any third party software to install a theme pack. Just double-click on the theme pack to install it. Sounds good, right?
One more sheer advantage is that you can install this pack on any Windows 7 running machine with simple double-click! 

How to create a theme pack?
Making a theme pack is basically a simple task when compared to theme, as you are not using any resource hacking programs and other utilities.

Procedure:
1. Right-click on Desktop, select Properties. Here you will see many default theme packs. In the same window, you will get all the options that are required to customize and create a theme pack in Windows 7.

2. Now you need to customize all the items that you want to change in your new theme pack.

3. Select Desktop Background option and select multiple wallpapers if you like to have slideshow feature in your new theme pack.
 Just input the wallpaper folder you want to use by hitting the browse button on the right and navigating to the folder. Also don’t forget to customize the slideshow time interval. To change this, click on “Change picture every” option at the bottom of the window.

4. Next, if you are interested in modifying sounds, just change the Windows sounds.

5. Though many of us don’t use screensaver, it’s good idea to have a nice screensaver in your favorite theme pack. Right-click on Desktop > Personalize > Screensaver and customize the screen saver according to your taste.

6. Finally, modify the color of the theme to suite the wallpaper of the theme pack. Just make sure that you select a color which looks good with all the wallpapers in the slideshow feature. To modify the color, Right-click on Desktop > Personalize > Window Color and customize the color so that it matches with the wallpaper/s that you have included in this theme pack.

Once you are done, just click the “Save theme” link and change the type to .themepack and click the save button.